It’s no secret to anyone who knows me that fall is my favorite time of the year. There’s just something about the crisp days, the crunch of leaves under my feet, campfires, hoodies, pumpkins, I could go on and on!
I love getting cozy on a cold fall night, under a blanket, with a fun project to work on, so I designed this cute sleepy pumpkin that will be perfect for snuggling on those cold nights. Hope you enjoy him!
Materials:
- 4.0mm/G Crochet hook
- Worsted weight yarn in orange, pink, black, brown, & green
- Fiberfill stuffing
- Tapestry needle
Abbreviations:
- MR = magic (adjustable) ring
- Ch(s) = chain(s)
- St(s) = stitch(es)
- Sc = single crochet
- Hdc = half double crochet
- Dc = double crochet
- Tr = treble crochet
- Sl st = slip stitch
- F/O = fasten off
- BLO = back loop only
- FLO = front loop only
- Inc = increase
- Dec = decrease
- […] = Work the stitches indicated between the brackets the number of times indicated
Pumpkin Panels:
(make 2)
- Row 1: Using orange yarn, ch 11, sc in 2nd chain from hook and each chain across, ch 1, turn. (10)
- Row 2: Inc, sc 8, inc, ch 1, turn. (12)
- Row 3: Inc, sc 10, inc, ch 1, turn. (14)
- Row 4: Inc, sc 12, inc, ch 1, turn. (16)
- Row 5: Inc, sc 14, inc, ch 1, turn. (18)
- Row 6: Inc, sc 16, inc, ch 1, turn. (20)

F/O after row 6. Repeat rows 1-6 to complete the second “lobe”, but do not fasten off. Instead, continue on to row 7 below in order to join the two pieces together.
- Row 7: Inc, sc 18, inc in the last st of first lobe, (this is where the join happens) inc in in the first st of the second lobe, sc 18, inc in the last st, ch 1, turn. (44)

Now that these two pieces are joined, the remainder of the rows will complete the rest of one side of the pumpkin.
- Row 8: Inc, sc 42, inc, ch 1, turn. (46)
- Row 9: Inc, sc 44, inc, ch 1, turn. (48)
- Row 10: Inc, sc 46, inc, ch 1, turn. (50)
- Row 11: Inc, sc 48, inc, ch 1, turn. (52)
- Row 12: Inc, sc 50, inc, ch 1 turn. (54)
- Rows 13-27: Sc across, ch 1, turn. (54 ) (15 rows)
- Row 28: Dec, sc 50, dec, ch 1, turn. (52)
- Row 29: Dec, sc 48, dec, ch 1, turn. (50)
- Row 30: Dec, sc 46, dec, ch 1, turn. (48)
- Row 31: Dec, sc 44, dec, ch 1, turn. (46)
- Row 32: Dec, sc 17, dec, ch 1, turn. (Yes, this only takes you halfway across the top; you will finish the other half shortly.) (19)
- Row 33: Dec, sc 15, dec, ch 1, turn. (17)
- Row 34: Dec twice, sc 11, dec, ch 1, turn. (14)
- Row 35: Dec twice, sc 6, dec twice, ch 1, turn. (10)
- Row 36: Dec twice, sc 2, dec twice. (6)
Fasten off at this point. With the wrong side of the piece facing you, skip the next 3 unworked stitches on row 31 and join the yarn again in the 4th stitch. Repeat rows 32-36 to finish up the other side and fasten off.
Repeat rows 1-36 to make the second pumpkin panel.

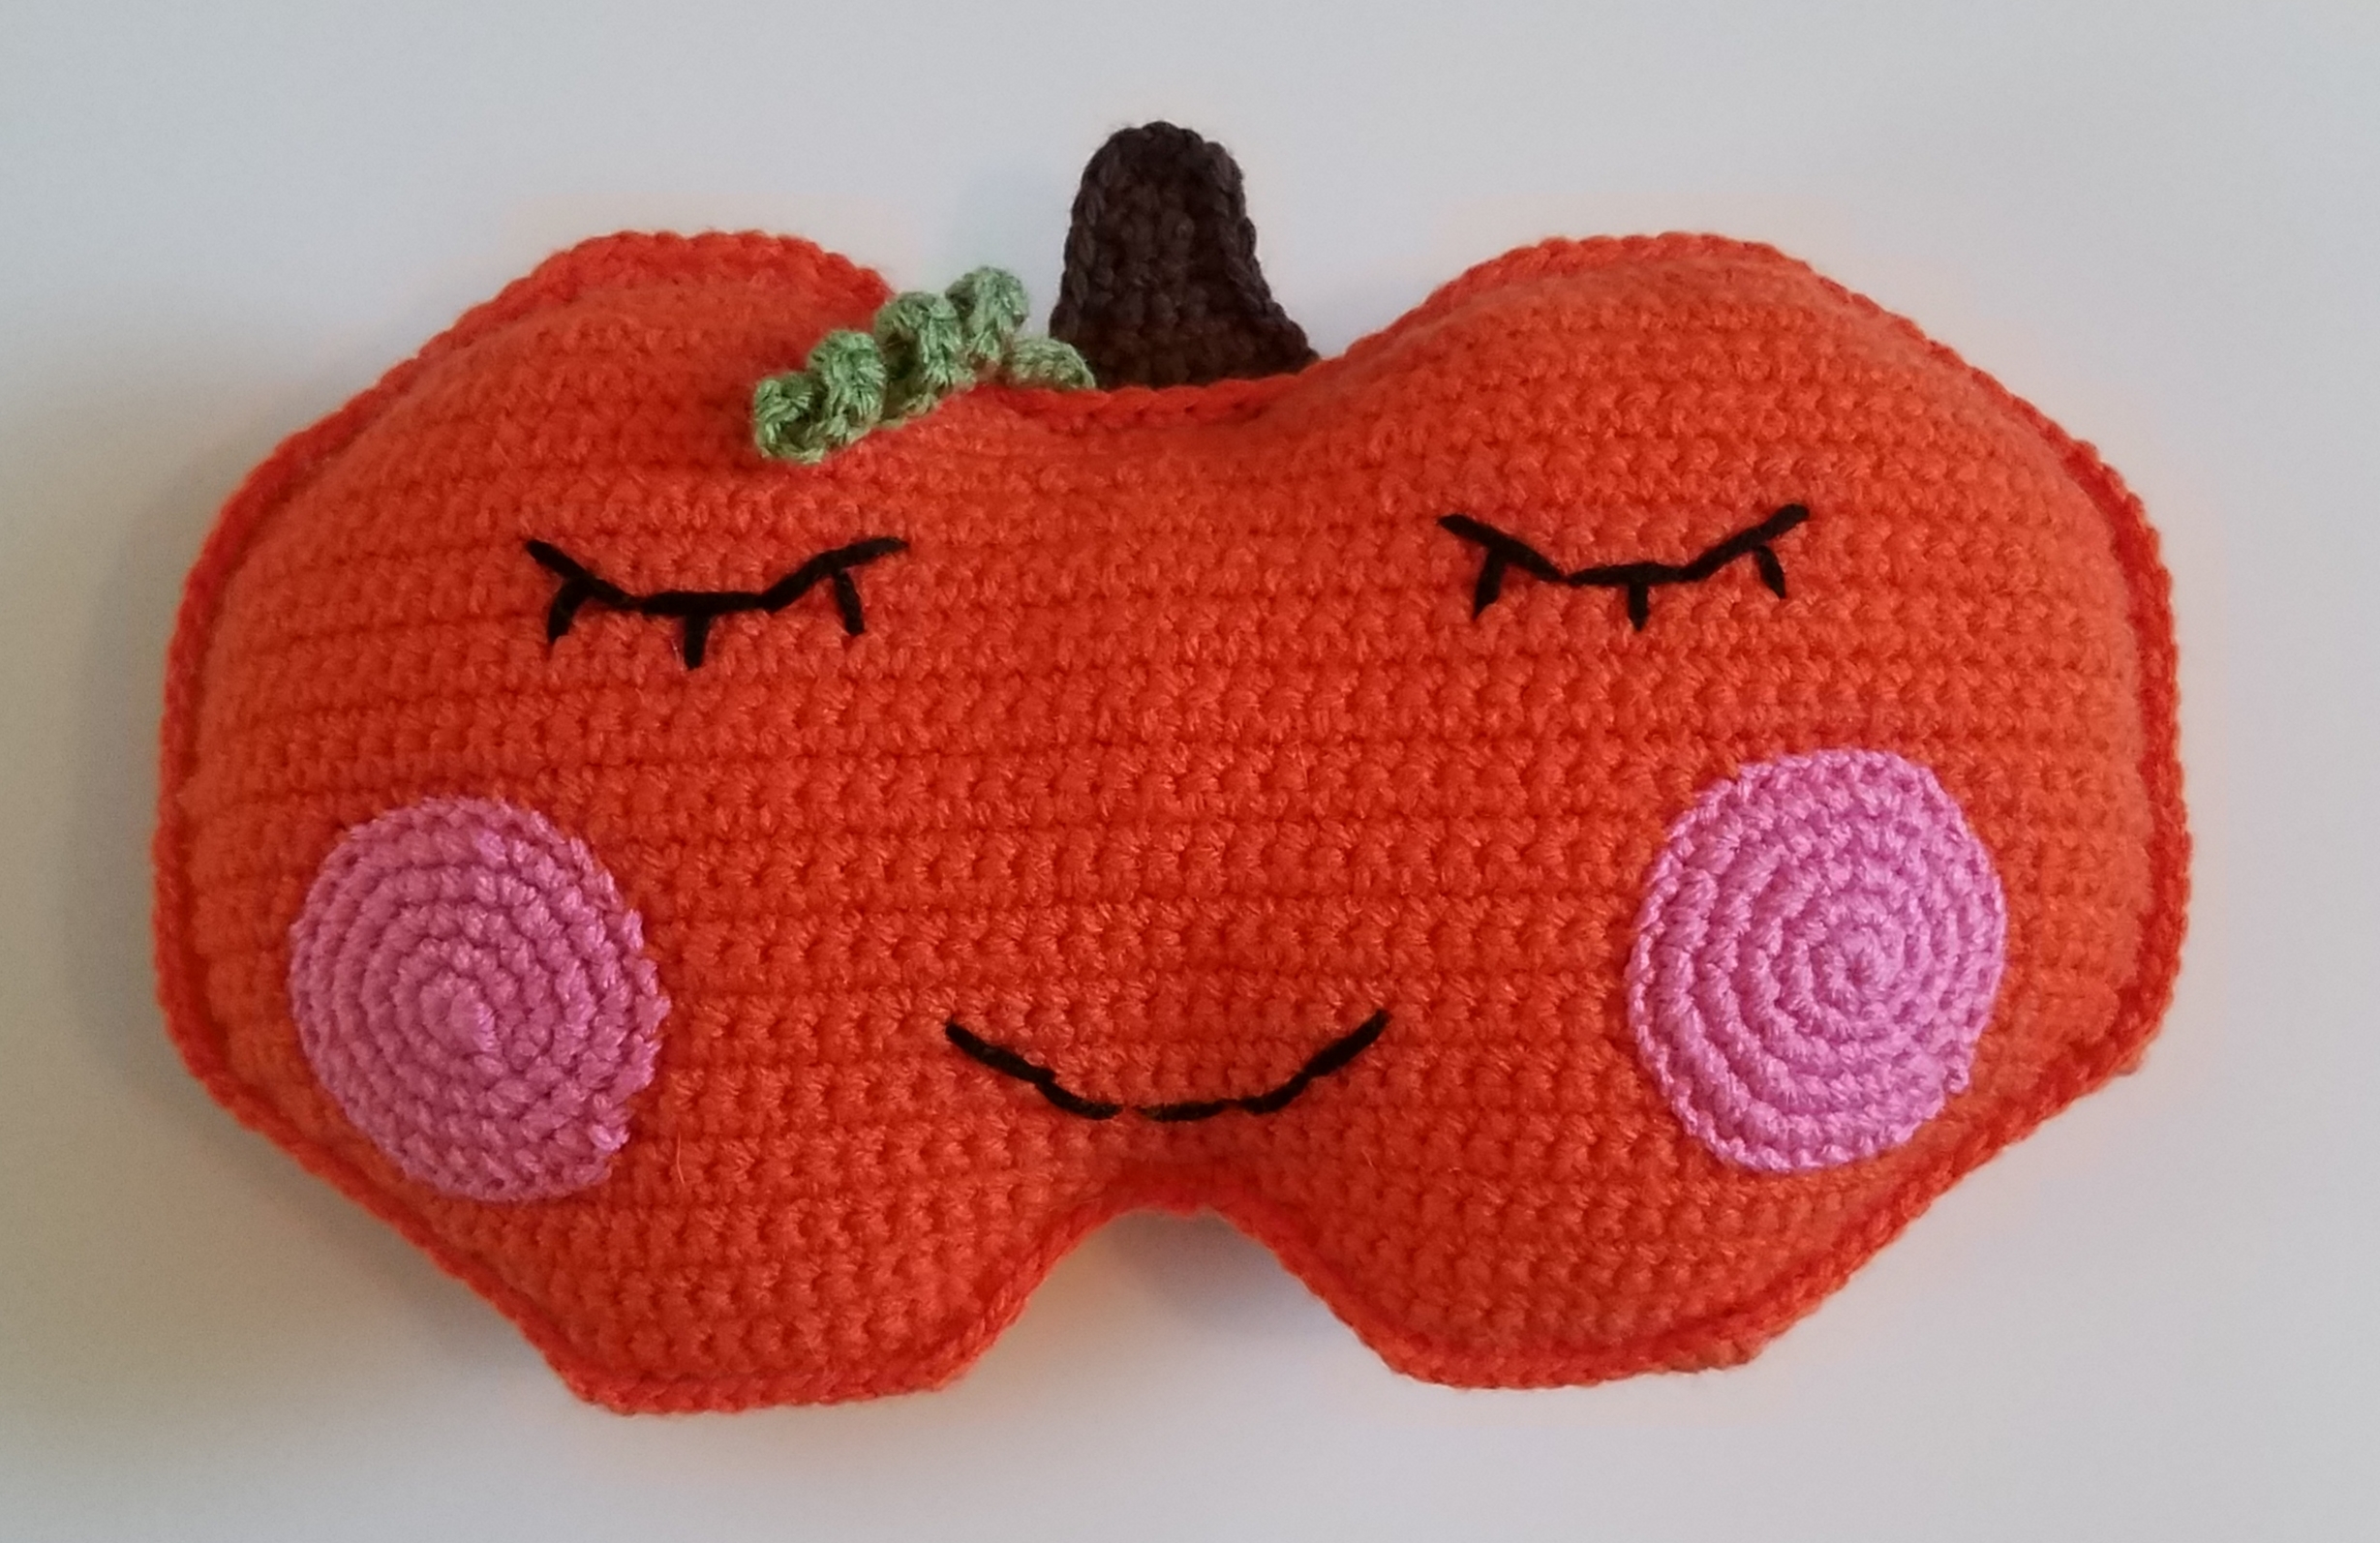
Cheeks:
(make 2)
- Round 1: Using pink yarn, sc 6 in MR. (6)
- Round 2: Inc around. (12)
- Round 3: [Sc, inc] around. (18)
- Round 4: [Sc 2, inc] around. (24)
- Round 5: [Sc 3, inc] around. (30)
F/O, leaving a tail for sewing.

Stem:
(make 2)
- Row 1: Using brown, ch 4, sc in 2nd ch from hook and each ch after, ch 1, turn. (3)
- Row 2-3: Sc across. (3)
- Row 4: Sc, inc, sc, ch 1, turn. (4)
- Row 5: Inc, sc 2, inc, ch 1, turn. (6)
- Row 6: Sc across, ch 1, turn. (6)
- Row 7: Inc, sc 4, inc, ch 1, turn. (8)
- Row 8: Sc across. (8)
F/O and weave in ends on the first one. Do not fasten off at the end of the second one. Instead, place pieces with wrong sides facing each other and sc around the edge of the pieces, making 2 sc in each corner. Then, f/o and weave in remaining end.

Vine:
- Using green, ch 19. Work 2 sc in the 2nd ch from hook and each ch across. F/O, leaving a small tail to attach to stem.

Assembly:
Before assembling your cuddler, you need to add the face details to one of the pumpkin panels! First sew on the cheeks, and then use some black yarn to embroider a cute face on your little pumpkin.
Attach the vine to the stem wherever you feel it looks best. Then, place your stem in between both pumpkin panels, centering it between the two humps on the top of the pumpkin. Using orange yarn (because if you use brown it will show through and be too obvious), attach the stem to the pumpkin panels using a whipstitch, taking care to to go all the way through both panels so the stem is secured on both sides and not leaving any holes.
Finally, join the orange yarn anywhere on your pumpkin and finish this little guy off by adding a row of sc around the entire edge, making sure to go through both panels to attach them to each other, and making 2 sc in each corner. Stuff with your fiberfill as you go along. Sl st to the first sc, fasten off, and weave in your end.
And now you have a cute, cuddly, fall friend to snuggle with all season!
